Quick handmade gift / Regalo rápido hecho a mano

Quick handmade gift / Regalo rápido hecho a mano

Hello, hello! I knoooowww! I am late again… uhg! I have so much work that I didn’t even have time to program this post and I just realized it was ‘Posting Day’. To be fair, I had everything ready, I only had to sit down and work on my blog…. Anyways, here I am.

¡Hola, hola! ¡Lo séeeee! Llego tarde otra vez… ¡uhg! Tengo tanto trabajo que no tuve tiempo de programar esta entrada y me acabo de dar cuenta que era ‘Día de Publicar’. Para ser justos, tenía todo listo, sólo tenía que sentarme y trabajar en mi blog… En fin, aquí estoy.

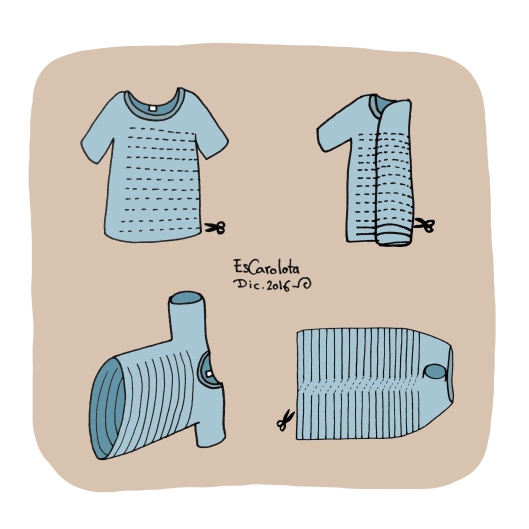
As Christmas is around the corner and some of you will be panicking thinking of what to make or buy… Well, I have something for you that will also help you to get rid of old T-shirts!

Como la Navidad está a la vuelta de la esquina y algunos de vosotros estaréis entrando en pánico pensando en qué hacer o comprar… Bueno, ¡tengo algo para vosotros que además os ayudará a deshaceros de camisetas viejas!

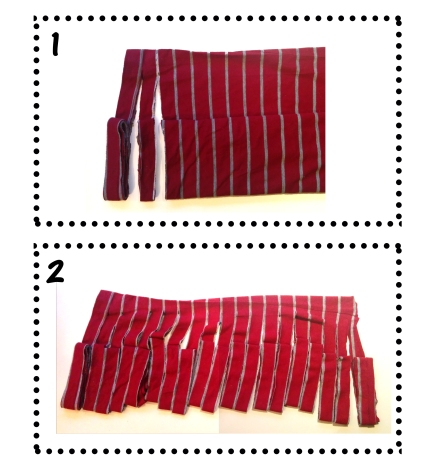
1&2.First we need to make thread out of T-shirts so we can do some chunky crochet.

1&2.Primero necesitamos hacer trapillo con unas camisetas de modo que podamos hacer ganchillo con trapillo.

2016-12-18-2-trapillo-camiseta-escarolota


2016-12-18-2-trapillo-camiseta-escarolota-paso-1

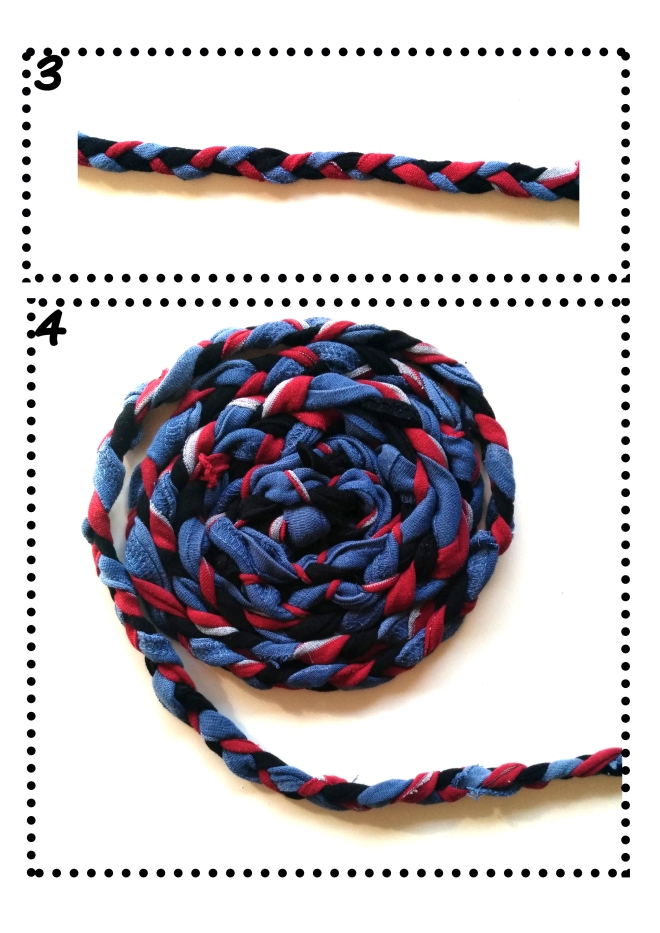
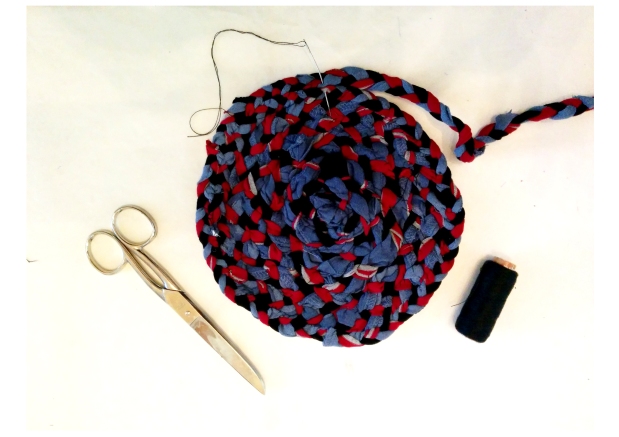
3&4.And now that we have the  chunky thread, it’s when the fun starts. Using three different threads, braid them into one super chunky thread and make a spiral with it.

3&4.Y ahora que tenemos el trapillo, es cuando empieza la diversión. Usando tres hilos de trapillo diferentes, trenzadlas en una cuerda súper gordita y haced una espiral con ella.

2016-12-18-2-trapillo-camiseta-escarolota-paso-3-4

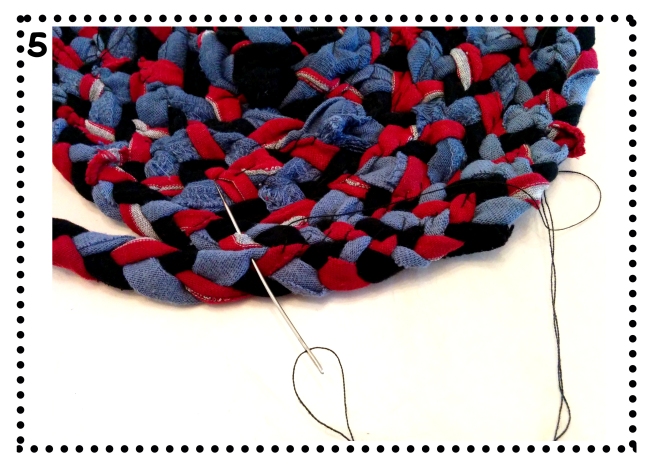
5.And let’s sew! (I tried with the sewing maching first, but I am not very good at it yet… You can try, though, it is quicker if you know how to do it). [If you know how to crochet, that is quicker than sewing, but the outcome will be slightly different].

5.¡Y vamos a coser! (Lo intenté primero con la máquina de coser, pero aún no se me da muy bien… Pero vosotros lo podéis intentar, es más rápido si sabes cómo hacerlo). [Si sabéis hacer ganchillo, eso es más rápido que coser, pero el resultado será ligeramente diferente].

2016-12-18-2-trapillo-camiseta-escarolota-paso-5

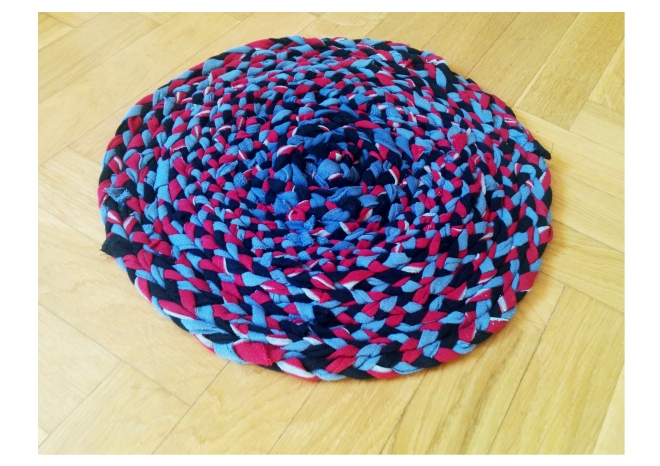
And this is the outcome.

Y éste es el resultado.

2016-12-18-2-trapillo-camiseta-escarolota-resultado-alfombrilla

Hope it helps you!

¡Espero que os ayude!


Ready-To-Print Xmas Card / Tarjeta de Navidad Lista-Para-Imprimir

Ready-To-Print Xmas Card / Tarjeta de Navidad Lista-Para-Imprimir

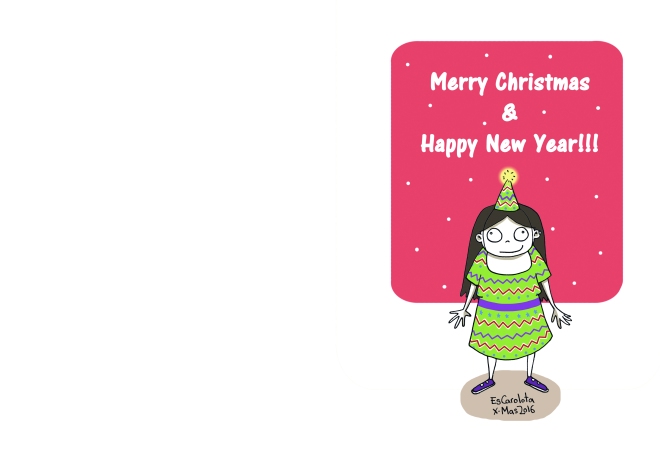
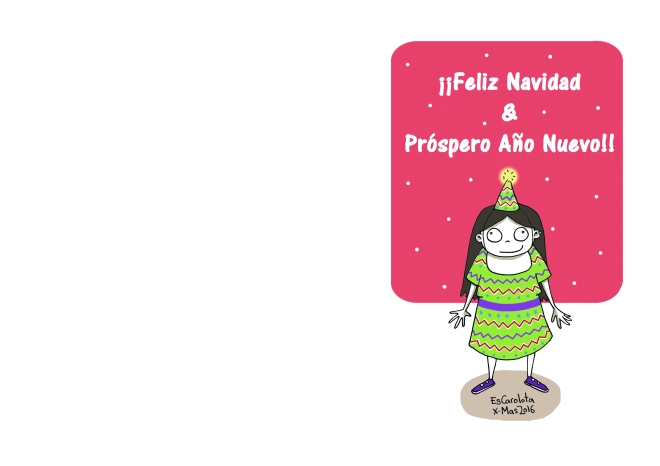
Hi everybody! Late post today as I am buried in work. BUT! I come with an present for you in case you are still looking for a Xmas card to send to your loved ones. It is ready to print on A4 size, so you only have to worry about what to write on it.

¡Hola a todo el mundo! Hoy toca una entrada un poco tarde porque estoy enterrada en trabajo. ¡Pero! He venido con un regalo para vosotros en caso de de todavía estéis buscando una tarjeta de Navidad para mandar a vuestros seres queridos. Está lista para imprimir en tamaño A4, así que sólo os tendréis que preocupar sobre qué escribir en ella.

IMPORTANT! Remember you are not allowed to charge for this work, neither get any  kind of economic benefit .

¡IMPORTANTE! Recuerda que no estás autorizado a cobrar por este trabajo, ni a recibir ningún tipo de beneficio económico.

2016-12-01-xmas-card-escarolota-english-cmyk2016-12-01-xmas-card-escarolota-spanish-cmyk

DIY – Hairband / Hazlo Tú Mismo – Diadema

DIY – Hairband / Hazlo Tú Mismo – Diadema

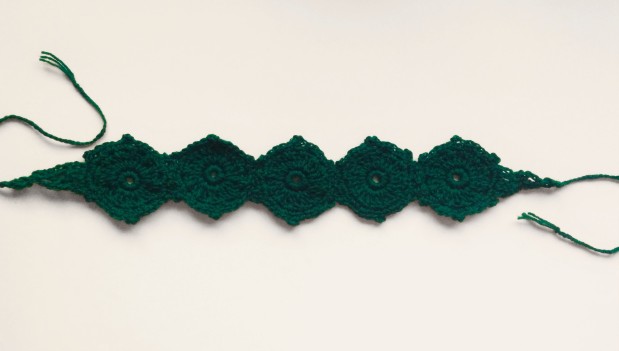
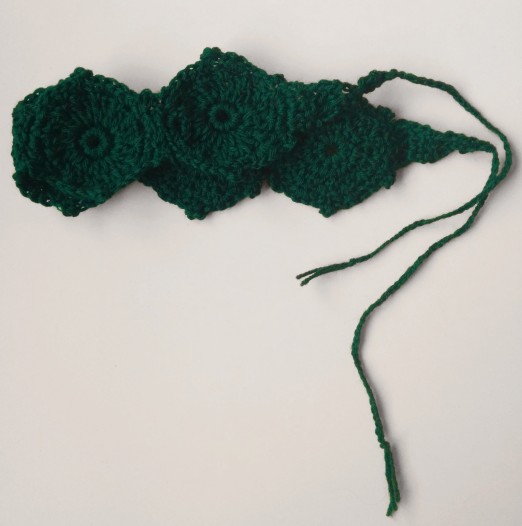
Bloggers are beings full of creativity. Today I want to share with you some of it. My crochet skills are pretty basic, but if I find a good tutorial, I am able to crochet kind of properly. María, from Rainbows of Colour, has a hairband tutorial very easy to follow. Go check it out if you want to make such a cool present as the below. It was a complete success!

Los blogueros son seres llenos de creatividad. Hoy quiero compartir con vosotros un poco de eso. Mis habilidades ganchilleras son bastante básicas, pero si encuentro un buen tutorial, soy capaz de tejer más o menos bien. María, de Rainbows of Colour, tiene un tutorial para hacer una diadema muy sencillo de seguir. Id a mirarlo si queréis hacer un regalo tan estupendo como el de abajo. ¡Fue un completo éxito!

Here you have the links! [Sorry guys, only in Spanish this time]

¡Aquí tenéis los enlaces!

Rainbows 0f Colour – diadema o bandana

Rainbows 0f Colour – patrón diadema de hexágonos

Diadema ganchillo - EsCarolota (4)b

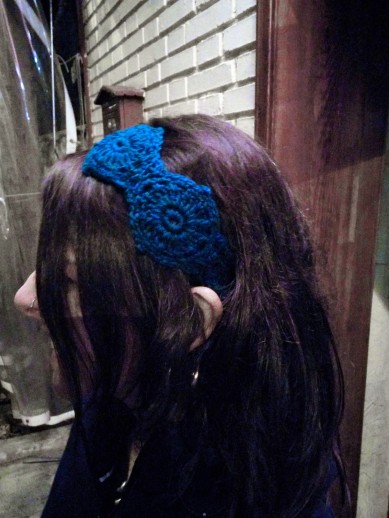
And look how good it looked on the birthday girl!

¡Y mirad qué bien queda en la cumpleañera!

Diadema ganchillo - EsCarolota (5)

I know, here it looks blue, but it’s green. // Lo sé, aquí se ve azul, pero es verde.


DIY: Halloweeny spiderweb / Hazlo Tú Mismo: Telaraña de Halloween

Hi! ¡Hola!

I know, it is not my style to post weekly and I cannot promise this will be like this in the future, but today I bring a surprise with me that, so far, I have never shared on the blog: a video tutorial! The only little (TINY) problem is that the video is in Spanish only. BUT, it is very, very, veeeeery easy to follow, so if you, my dear English speakers, are a bit curious, go on and watch it. And then, after all, you may want to give it a go at home.

Lo sé, no es mi estilo publicar semanalmente y no puedo prometer que esto vaya a ser así en el futuro, pero hoy traigo una sorpresa conmigo que, de momento, no había compartido nunca en el blog: ¡un vídeo tutorial! El único pequeño (DIMINUTO) problema es que el vídeo es sólo en español. PERO, es muy, muy, muuyyyyyy fácil de seguir, así que si vosotros, mis queridos angloparlantes, sois un poquito curiosos, id y vedlo. Y luego, después de todo, puede que queráis intentarlo en casa.

Click on the link below if you want to know how to make a cool spiderweb like this one I made.

Haced clic en el enlace que aparece abajo si queréis saber cómo hacer una telaraña tan chula como ésta que yo hice.

IMG_20151027_163621[1]

Hurray for the change of season! / ¡Hurra por el cambio de estación!

Hurray for the change of season! / ¡Hurra por el cambio de estación!

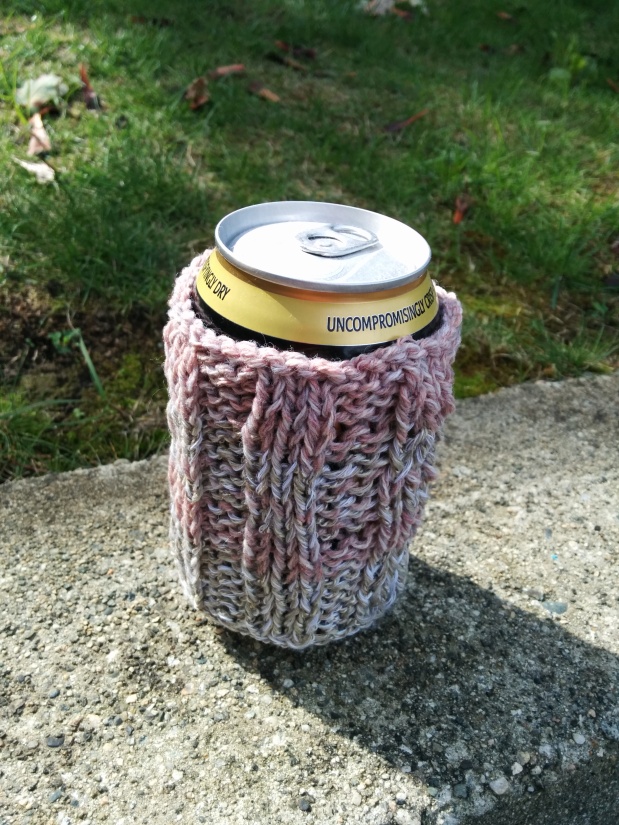
With the knitting season back, I wanted to start it with a little project I have been delaying for ages. It is a thing that can be used either in cold or hot weather. Awesome, I know. What would it be?… Hmm… A bottle cover! Yeih! It is actually pretty cool because it keeps the drinks at the temperature they are meant to be: at cold degrees or hot degrees. (Plus it also keeps your hands at hands temperature).

Con la temporada de tejer de vuelta, quería empezarla con un pequeño proyecto que he estado retrasando desde hace años. Es una cosa que se puede usar tanto con tiempo frío como caluroso. Genial, lo sé. ¿Qué puede ser?… Hmm… ¡Una funda para botella! ¡Seh! La verdad es que mola bastante porque mantiene las bebidas a la temperatura a la que deben estar: a grados fríos o grados calientes. (Y además mantiene vuestras manos a temperatura de manos).

IMG_20150907_122019[1]

This project is also great for other projects’ leftovers. So gather all those threads you didn’t know what to do with and make a colourful bottle cover! I am sure there are loads of patterns on The Internet, but me being a free soul, I didn’t follow any. For this project, you will need circular needles. Using size 4 wool and needles, cast on 36 stitches and follow a constant pattern of 3knit-3purl until you reach the length you were looking for.

Este proyecto también viene bien para aprovechar sobras de otros proyectos. ¡Así que recolectad todos esos hilos con los que no sabíais qué hacer y haced una colorida funda para botella! Estoy segura de que hay montones de patrones en El Internet, pero siendo yo un espíritu libre, no seguí ninguno. Para este proyecto, necesitaréis agujas circulares. Usando agujas y lana tamaño 4, montad 36 puntos y seguid un patrón constante de 3bobo-3revés hasta que alcancéis la longitud que estábais buscando.

IMG_20150907_122412[1]IMG_20150907_120430[1]

If you want a different size, the trick to calculate the number of stitches you are gonna need is very easy: knit few rows of six to ten stitches and you will see how your wool stretches. Based on that you can calculate the number of stitches you will need.

Si queréis un tamaño diferente, el truco para calcular el número de puntos que vais a necesitar es muy fácil: tejed unas cuantas hileras de seis a diez puntos y veréis cómo se estira vuestra lana. Basándoos en eso, podéis calcular el número de puntos que necesitaréis.

IMG_20150907_121438[6]

I made one that can be used for cans or glass bottles too, but making one for a mug is even easier: just knit a rectangle and add a couple of buttons to it.

Yo hice una que también se puede usar para latas o botellas, pero hacer una para una taza es incluso más fácil: simplemente tejed un rectángulo y añadidle un par de botones.


IMG_20150907_122459[1]

The trick for the elastic texture (yes, I have brought many tricks with me today) is to combine purl and knit stitches. I combined them in groups of three, which I feel works the best for me, but maybe groups of two or four may work as well as these ones. I suppose it all depends on the type of wool… The kind of wool I use is the one that expressly asks me to be knitted it in groups of 3knit-3purl stitches.

El truco para la textura elástica (sí, he traído muchos trucos conmigo hoy) es combinar punto bobo [del derecho] y del revés. Yo los combiné en grupos de tres, que es lo que mejor me funciona, pero quizá grupos de dos o cuatro pueden funcionar tan bien como estos. Supongo que todo depende del tipo de lana… El tipo de lana que yo uso es uno que expresamente me pide ser tejido en grupos de 3bobo-3del revés.

 Hope you’ve liked it and will get those needles to work!

¡Espero que os haya gustado y que pongáis a esas agujas a trabajar!

Knitting alternative / Alternativa al punto

Knitting alternative / Alternativa al punto

It is too hot for knitting.

Hace mucho calor para hacer punto.

Some people may think or even say it is not. Well, those people are wrong. Or they live well down south the Ecuador, where it is winter now. Or in Ireland, because everybody knows that summer is such a random thing in Ireland that it rarely is summer during summer time over there. So, as I was saying, it is too hot for knitting, but when you are a born knitter, it is very hard to stop knitting for few months just because the needles will slip through your sweaty fingers that cannot bear being in contact with wool during this aestival time.

Algunos pensarán o incluso dirán que no. Bueno, esa gente está equivocada. O viven bien al sur del Ecuador, donde ahora es invierno. O en Irlanda, porque todo el mundo sabe que el verano es una cosa tan aleatoria en Irlanda que rara vez es verano en verano por allí. Así que, como iba diciendo, hace mucho calor como para hacer punto, pero cuando eres una tejedora nata, es muy difícil dejar de tejer por unos meses sólo porque las agujas se resbalan por tus sudorosos dedos que no pueden soportar el estar en contacto con la lana durante esta época estival.

No jumpers so. Or hats. No socks. No gloves, neither scarfs… I cannot even look at these kind of clothes through the shop windows! Have you seen it? Heat wave and some pretending to sell brumal clothes. Unbelievable.

Así que nada de jerséis. O gorros. Nada de calcetines. Ni guantes, ni bufandas… ¡No puedo siquiera mirar ese tipo de ropa en los escaparates de las tiendas! ¿Lo habéis visto? Ola de calor y algunos pretendiendo vender ropa de invierno. Increíble.

IMG_20150728_180349[1]

Where was I? Oh, yes, what to do? Many things of course, but I went for a cute little thing that I could share with other people because, at the end of the day, I am not such a hoarder and I like to share.

¿Por dónde iba? Ah, sí, ¿qué hacer? Muchas cosas, por supuesto, pero me decidí por una linda cosita que puedo compartir con otras personas porque, al fin y al cabo, no soy tan acaparadora y me gusta compartir.

IMG_20150728_182059[1]

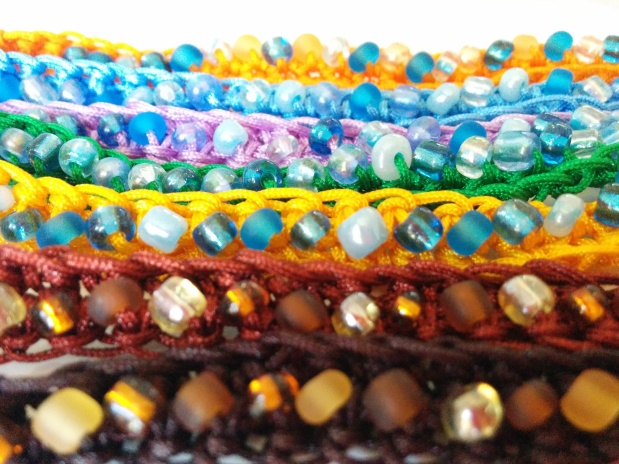
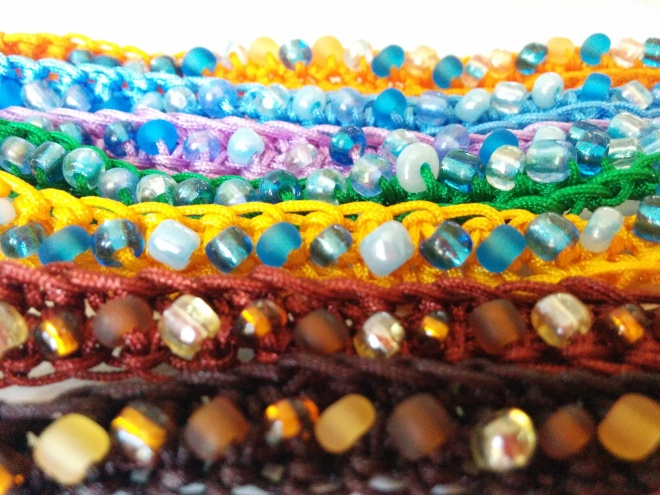
I follow a blog of a nice Spanish crocheter called Bluü, who not long ago was showing how to make bracelets with basic crochet. I only do crochet in time to time and I found the steps to follow very easy. The video tutorial is in Spanish, but if you know basic crochet it will be very easy to follow, so I encourage you all to give it a go, no matter your Spanish level.

Sigo un blog de una agradable ganchillera española llamada Bluü, que hace no mucho estaba enseñando cómo hacer pulseras con ganchillo básico. Yo sólo hago ganchillo de cuando en cuando y me pareció que los pasos a seguir eran muy sencillos. El vídeo tutorial es en español, pero si sabes lo básico del ganchillo, te será muy fácil seguirlo, así que os animo a todos a intentarlo, sin importar vuestro nivel de español.

IMG_20150728_182142[1]

It is actually a great summer activity because you will not handle a lot of thread (no sweating), it can be done anywhere (from the beach to the house hammock… try not to do it in the bathroom, that’s a bit disgusting) and does not require a lot of attention (you can listen to your neighbours’ gossip). All upsides!

La verdad es que es una estupenda actividad veraniega porque no se maneja mucho hilo (no se suda), se puede hacer en cualquier sitio (desde la playa a la hamaca de casa… intenta no hacerlo en el baño, es un poco asqueroso) y no requiere mucha atención (puedes escuchar los cotilleos de tus vecinos). ¡Todo ventajas!

I didn't have much bead variety, but you get the idea. No tenía mucha variedad en lo que respecta a las cuentas, pero pilláis la idea.

I didn’t have much bead variety, but you get the idea.
No tenía mucha variedad en lo que respecta a las cuentas, pero pilláis la idea.

Here you have the link to the tutorial (once there feel free to surf around the website, it is a lovely blog!):

Aquí tenéis el link al tutorial (una vez ahí, sentiros libres de surfear por la página, ¡es un blog precioso!):

http://www.thebluuroom.com/como-hacer-una-pulsera-de-ganchillo-con-bolitas/

DIY – Woolly Hat / Hazlo Tú Mismo – Gorro de Lana

DIY – Woolly Hat / Hazlo Tú Mismo – Gorro de Lana

Resulta que la semana pasada perdí mi gorro de una manera bastante estúpida. Fui a hacer la compra y, como siempre, al entrar en la tienda me quité el gorro para no morir de calor y, muy inteligentemente, me lo puse debajo del brazo… llevando el abrigo puesto. Siendo yo como soy, a los dos minutos de estar haciendo la compra, olvidé por completo que llevaba un gorro bajo el brazo, MI gorro. Abreviando un poco, mi gorro decidió escapar y algún alma «bondadosa» decidió adoptarlo.

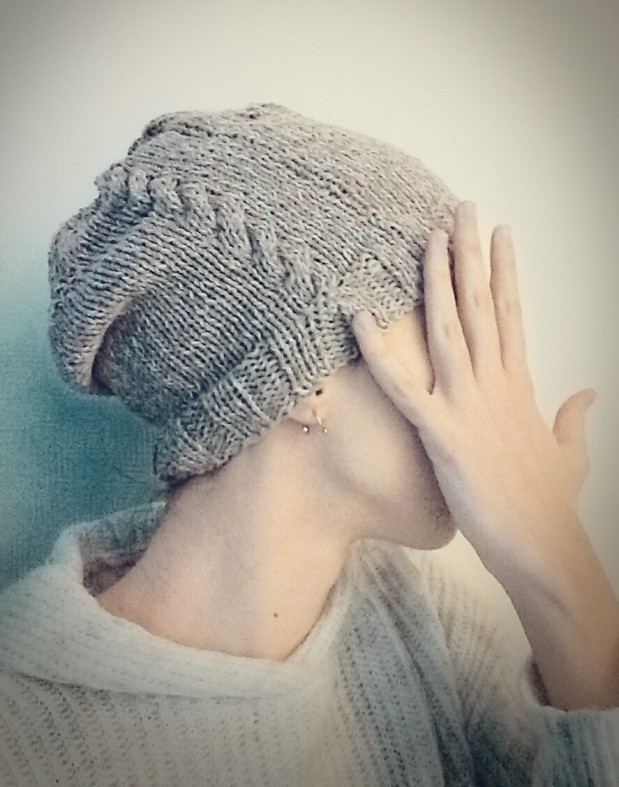
It happened that last week I lost my hat in a very stupid way. I went grocery shopping and, as always, when entering into the supermarket, I removed my hat to not to die from the heat and, very intelligently, I put it under my arm… while wearing my winter coat. Being as I am, two minutes after starting the shopping, I totally forgot that I was carrying a hat under my arm, MY hat. Long story short, my hat decided to escape and a «kind-hearted» soul decided to adopt it.

Estando así, sin gorro, gorrisnuda que se dice en el Mundo de los Gorros, el fin de semana fuimos a comprar un poco de lana para cubrir mi cabecita. Me inventé un patrón muy sencillo que podéis emular (uh, ¡palabro!) ¡gratis! Bueno, la lana y eso ya os lo compráis vosotros.

Being like this, without a hat, hatless as they say in HatLand, we went to buy some wool during the weekend to cover my little head. I made up a very easy pattern that you can emulate (uh, fancy word!) for free! Well, the wool and all that you buy it yourself.

IMG_20150130_125018[1]

Materiales: Agujas circulares de 4mm, lana de 4mm. Un ovillo debería ser suficiente, pero por si acaso comprad dos.

Materials: 4mm circular needles, 4mm wool. One ball should be enough, but buy two just in case.

IMG_20150130_125144[1]

1. Monta 90 puntos y sepáralos por la mitad de modo que tengas 45 puntos por un lado y 45 por el otro. Si ves que necesitas más o menos puntos porque tu cabeza es un poco más grande o más pequeña, intenta añadir o restar puntos en múltiplos de 3. Os dejo un vídeo para que veáis cómo hacer el Magic Loop, está en inglés, pero os podéis hacer una idea.

    Cast on 90 stitches and divide them by the middle so you get 45 stitches on one side and 45 on the other side. If you see that you need more or less stitches because your head is a bit bigger or smaller, try to add or take away stitches in multiples of 3. I leave you a video so you can see how to do the Magic Loop.

https://www.youtube.com/watch?v=6KccLlkTKzE

2. Teje intervalos de 3 puntos del derecho y 3 del revés durante las siguientes 10 hilerasCONSEJO: Pon un marcador para saber dónde está el inicio.

     Knit intervals of 3 knit stitches and 3 purl stitches for the next 10 rowsTIP: Put a marker to know where the beginning is.

3. Después de haber tejido esas 10 hileras, sigue este patrón (todos los puntos serán del derecho):

– Teje seis puntos, saca con una tercera aguja los tres puntos siguientes, teje normal los tres puntos que siguen y ahora retoma y teje esos tres puntos que sacaste.

– Repite el paso anterior.

– Teje hasta la mitad.

– En la segunda mitad, teje seis puntos, saca tres con una tercera aguja, teje normal los tres puntos que siguen y retoma y teje los tres puntos que sacaste.

– Teje hasta el final de la vuelta.

– Teje cinco vueltas normales (puntos del derecho).

– En la sexta vuelta, repite los pasos anteriores. Así conseguirás el entrelazado.

3. After knitting those 10 rows, follow this pattern (all the stitches will be knit stitches):

– Knit six stitches, take out the three following stitches with a third needle, knit the next three stitches and take back and knit the three you were holding on the third needle.

– Repeat the previous step.

– Knit until the middle of the row.

– In the second half, knit six stitches, take out three stitches with a third needle, knit the three following stitches and take back and knit the three stitches you were holding on the third needle.

–  Knit until the end of the row.

– Knit five regular rows (knit stitches).

– In the sixth row, repeat the previous steps. This is how you will get the cables.

IMG_20150130_124909[1]

4. Disminuciones. Hicé un par de rondas de disminución cuando llevaba unos 15-16 cm. Y con unos 18 centímetros empecé a disminuir deprisa (una disminución por cada tres puntos y, después de unas tres vueltas, una disminución por cada dos puntos), ya que si se va disminuyendo a poquitos, al final se consigue un gorro puntiagudo, en vez de uno con un final redondito.

     Decreasing. I did a couple of decreasing rounds when I had reached the 15-16 cm. And when I had around 18 cm I started to decrease quickly (a decrease for every three stitches and, after three rows or so, a decrease for every two stitches), as if you decrease slowly, you will get a pointy hat, instead of a hat with a round end.

IMG_20150130_125003[1]

Tadáh!

DIY – Handmade cushions / Hazlo Tú Mismo – Cojines hechos a mano

[En español más abajo]

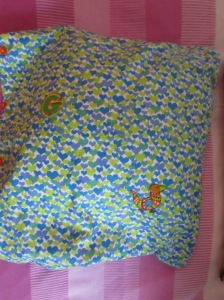
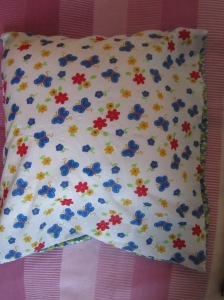
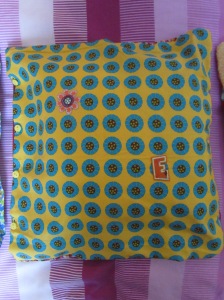
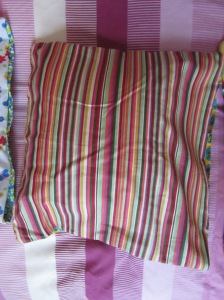
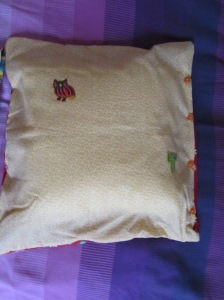
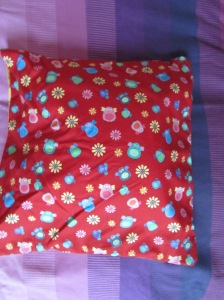
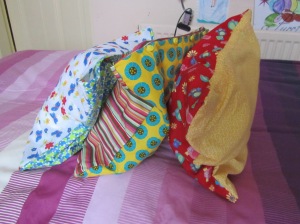
If you were thinking of making an original and personal present, here I’ve brought an idea! I made these cushions for three children (pictures below the text) and I chose a different style for each of them (that’s the good thing of doing things by yourself, you can choose, adapt, personalize, customize!).

Some people prefer to stitch the cloth to the actual cushion, but I thought it would be better to make a cover that can be put into the washing machine.

What do we need then? Cushion, fabrics a bit bigger than the cushion (so the cushion will fit inside the cover easily), needle, thread, some buttons (or velcro if you want to do it quicker and easier) and, this is up to you, some patches to decorate the cover.

Steps:

1. Make sure the fabrics you have chosen are a bit bigger than the cushion (you’ll need two fabrics per cushion).

2. Put both fabrics together in a way that the sides that you want to see at the end covering the cushion are touching each other (it would be like having the cover inside out).

3. Sew three sides (we need the fourth one to be able to put the cushion inside).

4. For the fourth side, fold each cloth on itself and sew it to avoid it from fraying.

5. Draw from the inside out the cover, so the seams will be inside now.

6. Sew the  buttons or stick the velcro on the fourth side. (If you choose buttons, after sewing them you’ll have to make the wholes for them and, after that, sew the edge of the wholes to prevent fraying).

7. Add the patches and put the cushion inside the cover.

Below the text, I’ve added some pictures of the cushions I made. I rather recommend you to use a sewing machine because it’s quicker, easier and the seams are better done. Even though, I did not use a sewing machine and it didn’t take me so long… That’s up to you now, as I said, this is only an idea.

——————————————————————————————

—————————————

———————————————————————————–

Si estabas pensando en hacer un regalo original y personal, ¡aquí traigo una idea! Hice estos cojines para tres niños (fotos bajo el texto) y elegí un estilo diferente para cada uno de ellos (eso es lo bueno de hacer las cosas tú mismo, ¡puedes elegir, adaptar, personalizar, customizar!).

Algunas personas prefieren coser la tela al cojín, pero yo creo que es mejor hacer una funda que se pueda meter en la lavadora.

¿Qué necesitamos entonces? Cojín, telas un poquito más grandes que el cojín (para que podamos meter el cojín fácilmente en la funda), aguja, hilo, algunos botones (o velcro si quieres hacerlo más rápido y fácil) y, si quieres, algunos parches para decorar la funda.

Pasos:

1. Asegúrate de que las telas que has escogido son un poquito más grandes que el cojín (necesitarás dos telas por cojín).

2. Pon ambas telas juntas de modo que los lados que quieres que queden fuera se estén tocando (sería como la funda dada la vuelta).

3. Cose tres lados (necesitamos el cuarto para poder meter el cojín dentro).

4. Para el cuarto lado, dobla cada tela sobre sí misma y cóselas para evitar que la tela se deshilache.

5. Dale la vuelta a la funda, así las costuras quedarán dentro.

6. Cose los botones o pega el velcro en el cuarto lado. (Si eliges botones, después de coserlos, tendrás que hacer los agujeros para ellos y, luego, coser los bordes de los agujeros para que no se deshilachen).

7. Añade los parches y pon el cojín dentro de la funda.

Aquí abajo he añadido algunas fotos de los cojines que hice. Os recomiendo usar una máquina de coser si es posible porque es más rápido, fácil y las costuras quedan mejor hechas. Sin embargo, yo no usé máquina de coser y tampoco me llevó mucho tiempo… Eso depende de ti ahora, como dije, ésto es sólo una idea.

IMG_1188

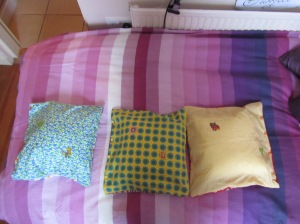
The three cushions.

As you see, I chose a different cloth for each side. / Como ves, elegí una tela diferente para cada lado.IMG_1190 IMG_1191

The second cushion. / El segundo cojín:
IMG_1192 IMG_1195And the third cushion. / Y el tercer cojín:

IMG_1197 IMG_1198

IMG_1202